
A circuit board comprises various parts, including diodes, resistors, and rigid boards. Each item serves a unique purpose, but a varistor mainly protects the setup.
A varistor is one of the critical components in a circuit board. In a technical sense, they are not typical resistors but dynamic ones. The resistance changes with the change in voltages. You will learn more about it shortly.
This article describes varistors, how they work, and their regular types. You will also learn how to identify or read various symbols. You can also get some real-world examples here. This guide can benefit DIY enthusiasts, retail and wholesale sellers, and local producers. If you still have any questions, don’t hesitate to contact us at UETPCB.
What are Varistors?
Varistors are critical components of a PCB. The name “varistor” comes from combining two names: Voltage and Resistor. Voltage + Resistor = Varistor.
A varistor is mainly a safety tool for a PCB. It doesn’t contribute to the PCB’s function as other components do; instead, it protects it. Therefore, identifying this item is very important for repairing the PCB. You will learn more about it in the next section.
What does a varistor do?
A varistor works depending on the voltage level. When the voltage is low or at an average level, the resistance it gives is too high. Conversely, when the voltage is too high, like in voltage surges, it provides meager resistance. In this situation, the high current can easily pass through the varistor. When the current already passed through this component, it doesn’t affect others. Thus, varistors protect the PCB from voltage surges.
What is voltage surge? Simply put, it is a sudden or rapid rise in voltage. It may happen for many reasons, like lightning strikes. No matter what causes it, it may last a few microseconds, long enough to damage most PCB parts.
Types of Varistor
There are many types of varistors. Internal ingredients, shapes, and specifications mainly classify them. Each type has its unique advantages and uses. You can classify varistors into two types based on their ingredients: MOV and ZCV. For your information, there are other types, but those are less common than these two. So, let’s stick to these two types.
Metal Oxide Varistors (MOVs)
These varistors are the most common because they are cheap and easy to manufacture. Zinc oxide is the primary raw material of these varistor resistors. Their composition also includes a minimal amount of other metal oxides.
MOVs are perfect for many PCBs, although they are only suitable for rigid PCBs. Household items like ovens, blenders, TVs, Fridge, or even your water pump use these varistors.
Silicone Carbide Varistors
As the name suggests, these varistors use silicon carbide as the raw material. SCV is rare in our daily life. However, you can find them in high-power systems like factories or large machinery.
There’s an interesting fact about SCV. Before MOVs were discovered, people used SCV for various circuit boards. Since silicone is an expensive material, therefore, people now prefer MOVs rather than SCV.
How to Read Varistor Symbol?
As you know, varistors mainly protect sensitive PCB components from voltage surges. Also, if you fail to choose the correct type of varistor, the consequences might be the same. Therefore, it becomes necessary to identify and select the right varistor for your PCB.
When you hold a varistor, you may find many varieties. Some are circular, while some are square-shaped. Some are blue, while some are red. Every variable has different labeling, which might confuse you. This section will give you some pointers by which you can quickly identify the varistor.
To make the discussion even easier, we will use some examples of real-world varistor. When you choose a varistor, follow this step-by-step pointer.
Pointer #1 Color
You may find varistors in different colors. The color of a varistor typically doesn’t change the functions. Various factories use it for visual identification. Therefore, you can focus on other indicators like type, size, and voltage.
Most varistors are blue. You can also find other colors, such as red, orange, yellow, or black. You may barely see the color green.
Pointer #2 Type of Varistor
In the previous section, you were introduced to varistor varistor types. So, you know, MOV is the most common one. You can find it in regular MOV electronics, so this section will mainly focus on this type.
Moreover, the varistor type may also change based on their shapes. The two most common types are D and S type. D stands for Disc Type, and S stands for Square Type. However, you may also find other types, like R for radial, T for tube, and B for bar.
Pointer #3 Size of the Varistor Component
The varistor size is also crucial; a varistor must specify it. The size mainly affects the ability of a varistor to absorb or drain away sudden voltage surges, so the bigger the size is, the more capacity. Varistor size also affects the voltage tolerances and clamping voltage.
Generally, the varistor size is measured in mm, and standard sizes are 05, 07, 10, 14, 18, 20, and more. This number is the diameter or diagonal of the varistor. For example, a D-type varistor shows “10” before or after the letter D, meaning the diameter of the varistor is 10 mm. If it is squared varistors, then the size is mainly diagonal.
Pointer #4 Voltage Tolerances
Voltage tolerance is another critical value. It creates a boundary of the voltage. Let’s take a look at an example. A varistor has a clamping voltage of 275, and its tolerance is 10%. After calculation, the clamping voltage may be between 247.5 V and 302V.
Usually, on varistor, you won’t see the tolerance like this. Instead, you will find a letter with a varistor symbol. It is commonly J, K, L, or M. J means 5%, K means 10%, L means 15%, and M means 20%. FYI: You will find K most of the time.
Pointer #5 Clamping Voltage
Clamping voltage is the highest value before a varistor begins to conduct and protect the PCB. People also call it peak or breakdown voltage. This value is crucial for PCB to ensure safety. You can find this value before or after the tolerance letter varistor symbol.
Let’s see an example. A 10D471K, where K means 10% tolerance, 10 is the diameter, and 471 represents the clamping voltage. In multiplier form, it becomes 47 x 10^1 = 470V ± 10%.
Note that some varistors may label clamping voltage as indicated without multiplier form. For example, S20K275 has 275 ± 10% clamping voltage.
Pointer #6 Other information
Except for the above five pointers, a varistor may include other information. In most cases, you might see factory names, product serial codes, and safety information.
An example might clear your confusion. The above picture shows other information, like STE, REG – Nr, C559, and more. STE might be the manufacturer’s logo. On the other hand, “CQC, RU, US” shows its standard certifications, and the product is from the USA. The REG -Nr C559 is the serial number of that particular product.
This information doesn’t directly affect the varistor’s functions. However, you may need it when replacing it.
Real-World Examples of Varistor Identification
Example #1 10D431K Varistor
- Size “10” indicates a diameter of 10mm.
- “D” is the type of varistor, which is Disk Type.
- “K” is the voltage tolerance, which is ±10%.
- “431” is the clamping voltage. In multiplier form, it is 43 x 10^1 = 430V.
Example #2 S20K275 Varistor
- “S” is the type of varistor, Square Type.
- Size “20” indicates the diagonal 10mm.
- “K” is the voltage tolerance, which is ±10%.
- “275” is the clamping voltage. As you can see, it is not in multiplier form but directly 275V.
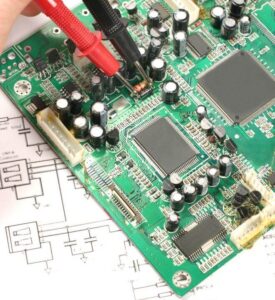
How to Test a Varistor?
You can test the quality of a varistor with a multimeter. You can easily get it in your nearby electric supply store.
First, take the varistor to a secured place and ensure no conductive materials are nearby. Now, set the multimeter to resistance mode since you will find the varistor resistance. If the varistor is functional, it should show infinite or near-infinite resistance.
You can also use a power supply and a multimeter for accurate varistor testing. After connecting all the wires, check the response under different voltages.
You must be careful when dealing with high voltage. Note that a high voltage can produce heat in the varistor. Also, if you keep the high voltage on for a long time, the varistor may burn and produce fumes. Actually, it takes only a few seconds.
Final Thought
Correctly reading PCB components can help you repair the PCB quickly. Fixing varistors is a typical case. When you read varistors, the key things include color, type, voltage tolerance, and clamping voltage. Always make sure you have correctly calculated the voltage. As you know, some breakdown voltage comes with or without multiplier form.
When dealing with circuit boards, you must avoid damaging components. Always follow the proper instructions on how to remove varistors from a PCB and install it. If you have any questions, you can ask them at our customer support forum. Our experts are always happy to assist you.