
We all know that a capacitor is the most important component of the circuit board. Because it is necessary for the proper working and efficiency of the device. However, at various times in our lives, we face the problem with the capacitors on the circuit boards. For example, if they become too old, worn out, damaged, or blown away. It will happen when excessive electricity passes through the pcb capacitor and becomes overheated. Whatever the reason for the damage of your circuit board capacitor, you should know how to remove and replace a capacitor with a new one. It will immediately improve the efficiency and performance of the circuit board. However, if you do not know how you can remove and replace the capacitor, this article will guide you on how to remove a capacitor from a circuit board and how to replace it with the new one as soon as it gets damaged.
It is not a difficult process and you can do this process on your own. So let’s study in this guide how you can do this process.
How to remove and replace a capacitor on a circuit board
It will take only a few dollars to replace a capacitor and start using a new one. However, the process is completely cheap and you can easily do it at home.
It is all about understanding the technique of how they work on a circuit board. In this way, you will be able to save money whenever your pcb capacitor gets damaged.
Let’s understand this step-by-step process of how to remove and replace a capacitor so that it becomes easier for you.
Step 1: Check out whether or not your capacitor is damaged and needs replacement
First of all, you should go through the damaging properties. It will give you an alert. Here are a few indicators that will tell whether or not you need to replace a capacitor.
- The screen of your device malfunctioning and showing uneven lines
- Sometimes you feel something is flickering on the screen that you do not understand and cannot tell what’s happening
- After random intervals are you feel the turning on and off of your device without any reason
- In the worst-case scenario, the gadget will not switch on
The main function of a pcb capacitor is to store and release energy, so it requires very great efficiency. In this way, you can prevent it from destroying the device when it is powered. In case you face the above signs, it is time to remove the capacitor and replace it with the new one.
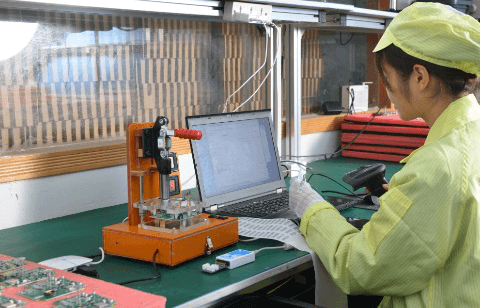
Step 2: Get the tools for the pcb capacitor removal
If you find one or more signs of pcb capacitor removal from the above-mentioned list, you should understand it is time for you to remove the capacitor. For this purpose, we have to arrange the following tools.
- The first thing that you will require in this case is a wrench or screwdriver. It is better if you use a HEX wrench which will be required while opening the device casing
- Other important tools are soldering iron and mask()
- The new capacitor that you will use after removing the previous one
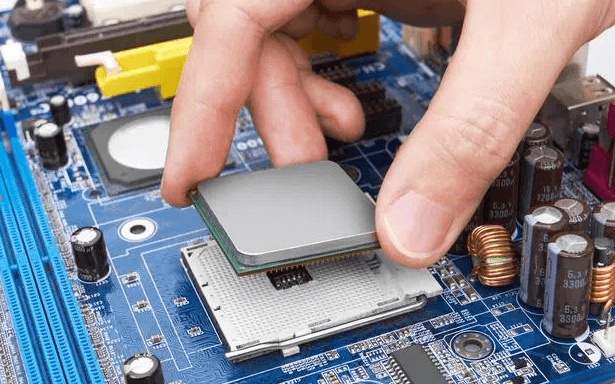
Step 3: Practically start working by accessing the domestic cluster
Now that you have gathered all of your tools and you are quite close to the removal procedure, you should critically start working to replace a capacitor. So the first step is to turn off your device so that it will be disconnected from the source. Remember you should also consider unplugging it from the main electrical outlet. Take safety precautions to avoid any kind of future hazards.
Now the circuit board is in front of you and you have all the tools
You can start working and the HEX wrench will be the first thing that you will require to open the casing. Screws are also important and you should keep them with you so that you will be able to use them whenever you want. In case you do not know how you can open the device casing, it is important to read basic instructions on the Internet or access the user manual that will guide you on how you can remove the device casing from the circuit board.
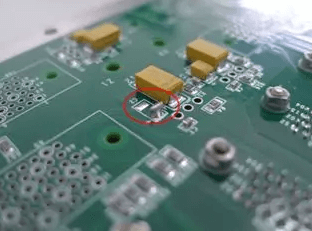
When you are successfully done with the process of removal of device casing, it’s time to examine the capacitor in PCB properly and confirm again what kind of damage it is facing.
Remember the damaged capacitor in PCB is always different in appearance as compared to the non damaged one.
You will see the following signs by directly examining the damaged capacitor.
- You will notice a frozen like brownish fluid that will seem to come out from the PCB capacitor
- Corrosion and shipping fluid is the most prominent and distinguishing features of damaged pcb capacitor that will immediately give you an idea
- As soon as you touch the capacitor, the lead will come out of it.
In this way, you will be able to identify the damaged pcb capacitor. Even if you observe one of these signs, it is one of the indicators that your capacitor needs replacement.
Another important sign that you will face is that it always has a convex shape that seems to bend outside. On the other hand, the new and working capacitor does not have this type of convex shape.
Step 4: Discard the faulty circuit board capacitor
Check the voltage, temperature rating, and capacitance of the old capacitor before removing it for replacement. It’s critical since you’ll need to replace it with a capacitor of a similar value for the gadget to function correctly.
Then, at the rear of the circuit board capacitor, identify the welding spot. It’d be likely to grip the pcb capacitor. Warm your heat gun and push it to the capacitor’s soldering back. Maintain the soldering iron in place until the capacitor separates from the circuit board. Then reverse the procedure to loosen the wire and remove the circuit board capacitor on the opposite side.
Too much solder may have been applied to the junction. The soldering iron will not be able to reach the precise location. As a result, remove the excess soldering from the rear of the circuitry with a soldering probe. Then, with the hot soldering iron in place, carefully remove the blown-out PCB capacitance.
There’s no need to rush the job. If you do it in a relaxing manner, you’ll get the best results.
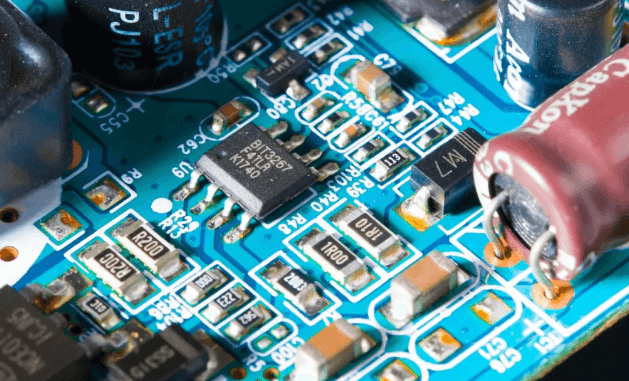
Step 5: Installation of new capacitor and soldering capacitor to circuit board
Mounting a new pcb capacitor is as important as learning to remove old and damaged capacitors. In this way, you will be able to complete the process of replacing the capacitor on the circuit board whenever you want and maintain the efficiency of the electric board properly. For this purpose, you will have to proceed with the soldering of the newly bought capacitor and immediately find out the solder holes. After the replacement, you will have to place your new capacitor on those holes and adjust and see how the size of this pcb capacitor is similar to the other pcb capacitor. In this way, you will be able to better position the new capacitor and maintain stability.
Remember that the new circuit board capacitor will work only when you have focused on the correct alignment of the positive and negative leads.
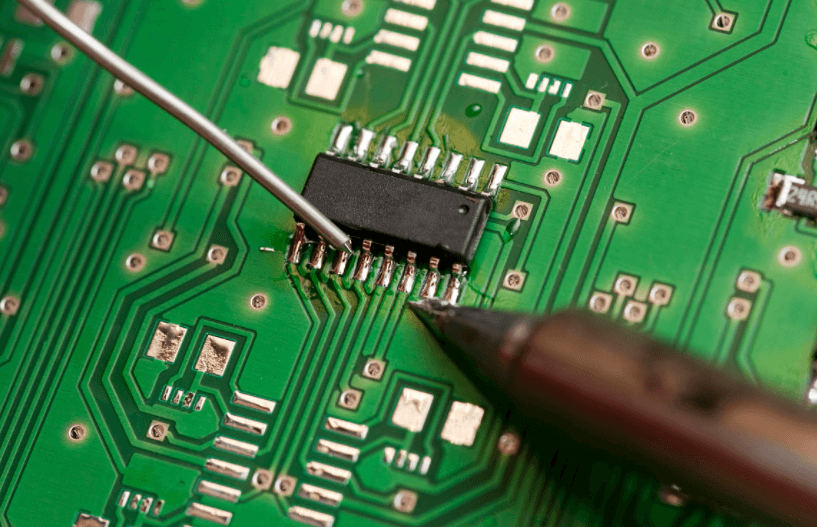
Now you will want to have the soldering iron that will assist you in this process.
For this purpose, press it against the back of the circuit board and you will see that it will adjust the pcb capacitor joints.
When you will become successful in maintaining harmony between soldering tips and adjusting it on the holes, it is time to press the wire lead of the board so that everything adjusts properly. Keep in mind that usually the soldering joints of the capacitors do not damage and they help in establishing the connection of the new capacitor with the circuit board, thus playing a part in maintaining the efficiency and functioning of the pcb capacitor.
Now that you have performed all of the pcb capacitor removal and soldering tasks, you will automatically know how you can adjust the circuit board back to the device casing properly. In this way, you will be able to wind up the process of the PCB capacitor replacement.
Final Verdict
A circuit board would not be complete without capacitors. They retain and discharge electrical charges and restrict the flow of some currents while letting others pass. They can sometimes fail, exploding and leaking their electrolyte contents all over the circuitry. When this occurs, it’s vital to consider how to disconnect soldered capacitors properly so that the circuit board may be cleaned and replaced quickly. A capacitor soldered to a circuit board may be removed with the correct tools and expertise.
This is a step-by-step instruction for replacing a capacitor on a circuit board. We hope that it will enable you to swiftly replace the broken circuit board capacitor in your smartphone or any electrical appliance with a new one. The procedure does not need any electrical knowledge. Just make sure you pay attention to detail and utilize the right circuit board capacitor value.